
THE 10 STEPS OF RAINWATER HARVESTING

What is Rainwater Harvesting?

Rainwater harvesting refers to the collection of rainwater for residential, industrial or commercial use. It can be used for irrigation, in the washing machine and to drink when filtrated properly.

Rainwater harvesting is a great source for back-up water in times of need, especially when we have water outages due to a burst pipe or water contamination.

Rainwater is free, so if collected and harvested correctly you might be able to take your water off-grid and save some money with ever-increasing rates.

Follow the steps below to ensure your Rainwater harvesting system is set set up correctly, and maintained properly.

Read more about Rainwater Harvesting and see our solution offerings…

THE 10 STEPS OF RAINWATER HARVESTING

Step 1: Establishing your rainwater needs

There are two words that should come to mind when you begin your Rainwater Harvesting (RWH): quality and quantity. It’s these two words that will help you work out how much water you are wanting to store and what you are going to use it for.

People often ask how much rain they can collect from their roofs. Here is a simple equation to help you:

1mm of rain x 1m2 of your roof = 1 litre of water

For example if it rains 2mm and your roof is 130m2 then you will have 260 litres of rain that you can collect.

You need to also look at your geographical location for how often and how much it will rain during the rainy seasons. This information is easy to acquire by visiting your local weather service website.

You will also need to look at your water bill to see how much water you use and how much you want to save based on your RWH needs.

This will establish if you have the space necessary for the storage of the water and the capacity of the water that you want to store.

Remember that your needs will be your end goal and can help you to identify what kind of system you require, what environment you live in, and if RWH is suitable for all or some of your needs.

If you want to use this water for irrigation, we just need to remove large debris that won’t block the pipes. If you want the water for washing of clothes or a dishwasher, it needs to be further filtered, and if you want to use the water for drinking and showering this will be filtered even further to ensure that it is safe for these uses.

Step 2: Storage and your rainwater collection area

Once you have established your needs and end goal, it is now time to move forward in the RWH process – choosing which storage vessel will work for you.

This includes where you want your tanks and what your tanks are made of. This determines whether you want tanks above ground or underground and whether the tank suits the look and feel of your home (the aesthetic).

Remember that tank size will be limited, based on the space you have to store them.

Tanks come in many materials including plastic, steel and concrete. This will also be a decision to make, based on your water needs and how you want your storage system to work.

There are two types of systems when it comes to RWH, a dry system and a wet system, with the main difference between the two systems being how the water is stored and transported.

In a wet system, the rainwater is stored in an underground tank or cistern that is located beneath the ground surface. The tank is typically made of concrete or plastic and is designed to hold a large volume of water. The tank is connected to the downspouts from the roof gutters, and the water is transported through a pipe to the tank. Since the tank is located underground, the weight of the soil above it helps to keep the water pressure consistent. A pump is typically used to extract the water from the tank and transport it to where it is needed.

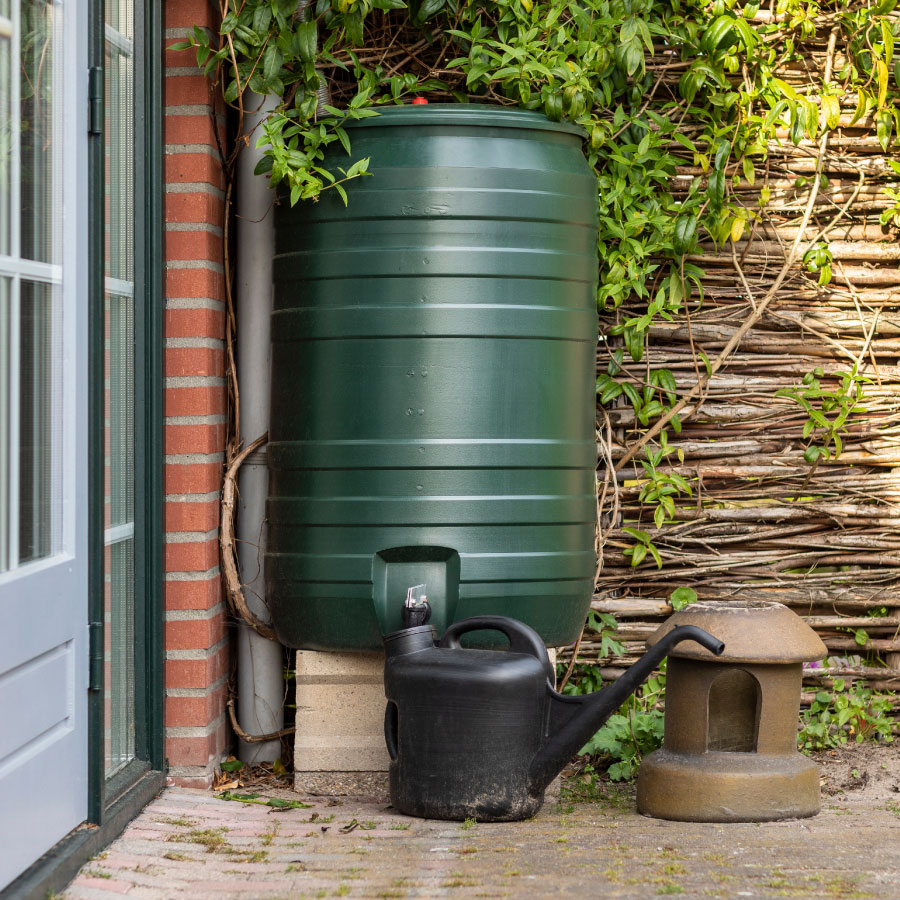
In a dry system, the rainwater is collected and stored above ground in a tank or cistern that is located near the house or building. The tank is also connected to the downspouts from the roof gutters, and the water is transported through a pipe to the tank. Unlike a wet system, the tank is not buried underground, and the weight of the water is what creates the pressure needed to transport the water to where it is needed. A pump may still be used in some cases to increase water pressure, but it is not always necessary.

Overall, the main difference between a wet system and a dry system is where the water is stored and how it is transported. Wet systems store water underground, while dry systems store water above ground. Both systems can be effective in conserving and re-using rainwater, but the choice of system will depend on factors such as space availability, cost, and personal preference.

When it comes to your collection area, we need to check your roof that it doesn’t contain any harmful materials such as lead paint and corrosion. This is the same when it comes to checking your gutters. The best way to check this is to spray down your gutters with a hose and assess if your gutters need to be replaced first.

The environment in which you stay can also affect the quality of your rainwater. If you live in a condensed area, your water will be more polluted and will have to undergo a more efficient filtration system. If you live in a less condensed area, your water will be less polluted and will require only basic filtration.

Step 3: Decide on the system that is right for you

You have two options when it comes to this – you can have a gravity-fed system or a pump system.

The gravity-fed system is great if you are using harvested rainwater for irrigation or topping up your pool.

A pump system will need to be used if you plan on using your water for your house as the pressure will need to be assessed and a pump will have to be decided on.

Talking to a pump specialist will help you decide which pump is most suitable for your needs, and the level of pressure required for your system.

You can also have a combination on the two, depending on your water needs.

Ultimately you want a rainwater harvesting system that meets your specific requirements, that helps you conserve water and that reduces your water bill.

Step 4: Filter leaves and other debris

Leaves and smaller debris can be harmful to your rainwater as they can break down and cause your water to carry more sediment and can even contribute to the formation of algae and unwanted mosquitoes.

The easiest way to avoid leaves and other debris from entering your tank is by using rain heads and a mesh head at the top of your chosen tank.

For these to be installed correctly we need to make sure that there is enough space between the tank head and the height of your house. That is why tank selection is so important.

If this is left unchecked, it can create problems with your rainwater collection.

Step 5: Diverting your first flush

Your first collection of rainwater will need to be diverted so that it does not contaminate your whole system, as the first rain will most likely wash off pollutants from your roof and you do not want this in your tank. This water does not need to be wasted though – you can use it to water your garden or feed it into the stormwater drains. Once the initial flush is complete, the clean rainwater is then directed to the storage tank.

There are several reasons why a first flush system is important in a rainwater harvesting system:

Improved water quality – By diverting the initial runoff, the first flush system prevents debris and contaminants from entering the storage tank. This helps to improve the quality of the harvested water, making it safer and more suitable for a wider range of uses.

Reduced maintenance – By removing debris and contaminants before they enter the storage tank, the first flush system can help to reduce the frequency of tank cleaning and maintenance.

Increased system efficiency – By removing debris and contaminants, the first flush system helps to prevent clogs and blockages in the system. This ensures that the water flows smoothly and efficiently, reducing the risk of overflow or other problems.

Overall, the first flush system is an essential component of a rainwater harvesting system, helping to ensure that the harvested water is clean, safe, and suitable for a range of uses. It is an easy and effective way to improve the quality and efficiency of your rainwater harvesting system.

Step 6: Protecting your rainwater system

Protecting a rainwater harvesting system is important to ensure that it functions properly and to prevent damage to the system.

As we already know, we need to keep leaves and mosquitoes out of the water. We also need to ensure that no sunlight or other organic matter can enter your rainwater system as this promotes the growth of algae.

To keep the sun away from your system you can use a solar shield which will keep the sunlight out. To keep insects and mosquitoes out you may require a fine mesh. This will once again ensure that you have the cleanest water possible inside your tank.

You also need to protect your tank from backflow, which is easily achieved by using a physical break in your tank or an air gap.

Step 7: How to manage standing water

The main reason for this step is to reduce sediment disruption, algae growth and to reduce the possibility of anaerobic fermentation.

It is natural for sediment to settle at the bottom of your tank, although the amount of sediment is determined by your filtration system and the rain heads and mesh you have in place.

By creating a small buffer at the bottom of your tank you can control the sediment and create a gap for the sediment to sit. The solution for this is to place an outlet tap about 100mm above the base of your tank. This layer of buffer water will help to lessen sediment disruption from any incoming water.

As discussed in Step 6, the growth of algae can be stopped by keeping sunlight out of your tank and pipes in order to stop the photosynthesising of algae.

If you have a wet system you will need to empty your pipes. This prevents odour and discolouration as well as fermentation within your pipes. You will need to drain this water depending on how much water you are willing to sacrifice. Once again you can use this water in your garden.

Step 8: Final stage of RWH filtration

This step is also dependant on your needs.

If you plan to use this water just for irrigation, a basic filtration system will work to keep out large sediment so as to not block your irrigation works. It is recommended that a 100 micron mesh is used and perhaps a little bit smaller.

If you plan to use the water for appliances and toilets, we will need to filter it a bit more in order to reduce colour and odours. A dual-stage filtration system is recommended here.

If you plan to use this water for washing and drinking, it will require a triple stage filtration system to ensure that no sediment, colour or odour gets into your pipes and that the cleanest water is delivered to your home.

Once this stage is complete, you can start to see your end goal and set yourself up for water success.

Step 9: Overflow

Water storage tanks aren’t designed to be completely full, but this can happen when there is heavy rainfall, or other events that might contribute to more water.

Ensure that your system has a properly installed overflow system to prevent damage or flooding in case the tank reaches capacity, where you have an outlet that is bigger than your inlet, in order for excess water to run off.

This run-off water doesn’t have to go to waste. You can have another tank installed, space permitting. Or you can use this water in your garden.

Step 10: Monitor and care for your system

Monitoring your water levels will help you determine if you have enough for your needs.

The easiest way to check your water levels is to install an analogue gauge or a digital gauge and this all depends on your needs and what you are using your water for.

Regularly check for leaves and debris, and clean out your system by doing a first flush after a long period without rain.

For more tips and advice on the care and maintenance of your rainwater harvesting system, download our handy checklist…